In the Previous post on GitHub actions, I gave an introduction into what GitHub actions are and I explained that GitHub Actions are a set of instructions that help you automate any GitHub cause and effect on GitHub. I also mentioned the Basic concepts of an Action and benefits of GitHub Actions. In this article, we will look at a comprehensive guide to automate workflows using GitHub Action in your project.
Step 1: Creating a new action
To get started all you have to is get your project ready by creating a repository or using an already existing repository. Github has made everything super easy by providing pre-existing options for setting up your workflow in the GitHub marketplace.
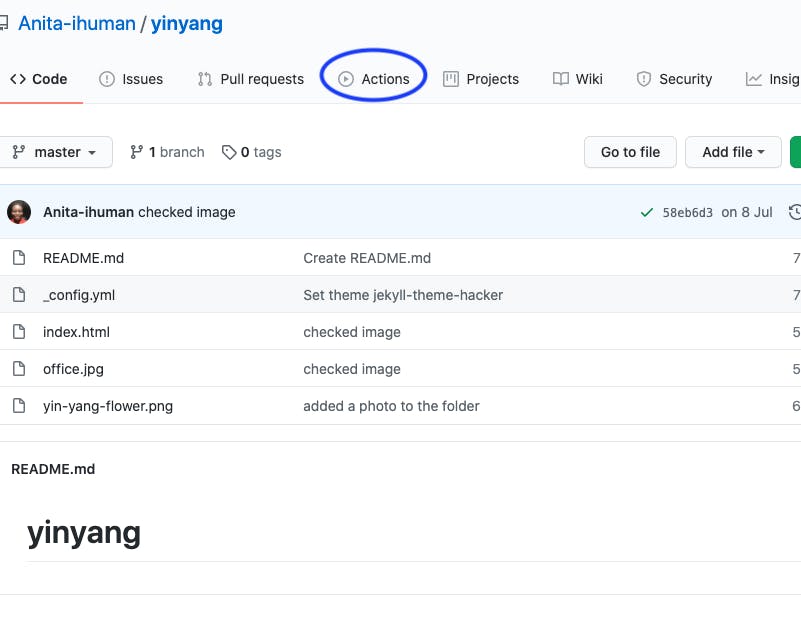
- Inside the repository that you intend to automate actions in, you will navigate to the Actions tab on our repository page
If you are within the actions page you will find some starter workflows templates that Github provides for us to get started with. since this is a basic HTML and CSS project, I am getting the Jekyll workflow, so I will click Set up this workflow
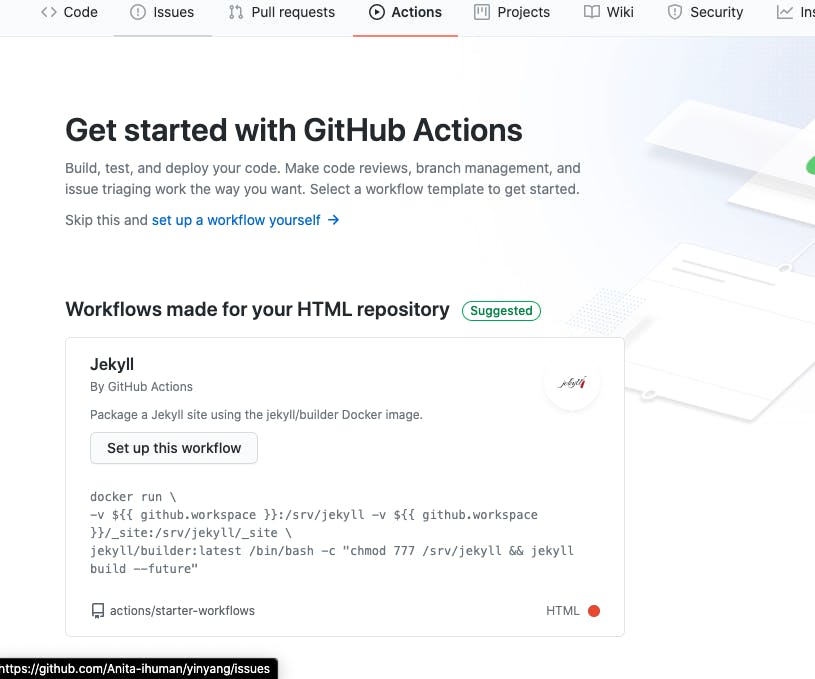
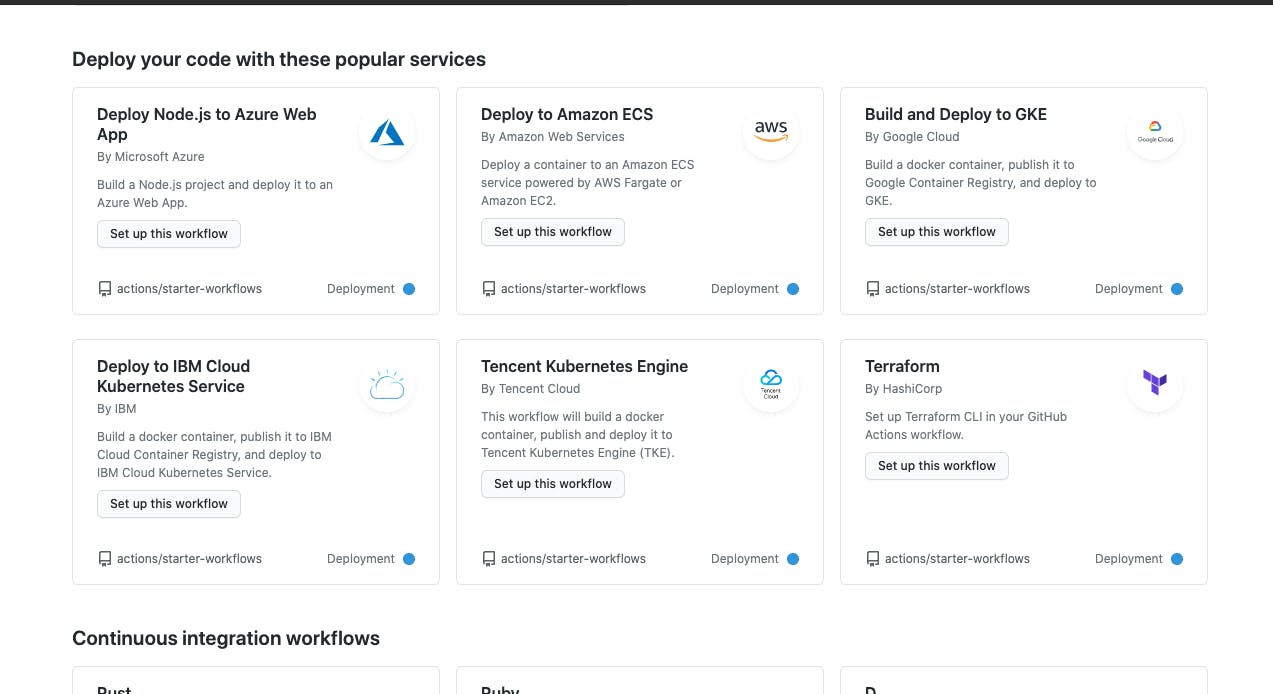
Although you can create a new Blank workflow if you want to, there are varieties of workflow template options available, depending on the project and the type of outcome you expect to get from the workflow you can choose anyone. These actions in the marketplace are reusable.
Once the page loads, you will get a new file editor with already existing configurations, You rename the YAML file anything you like or even leave the name as it is. You can also make some changes within this file to fit your expectation.
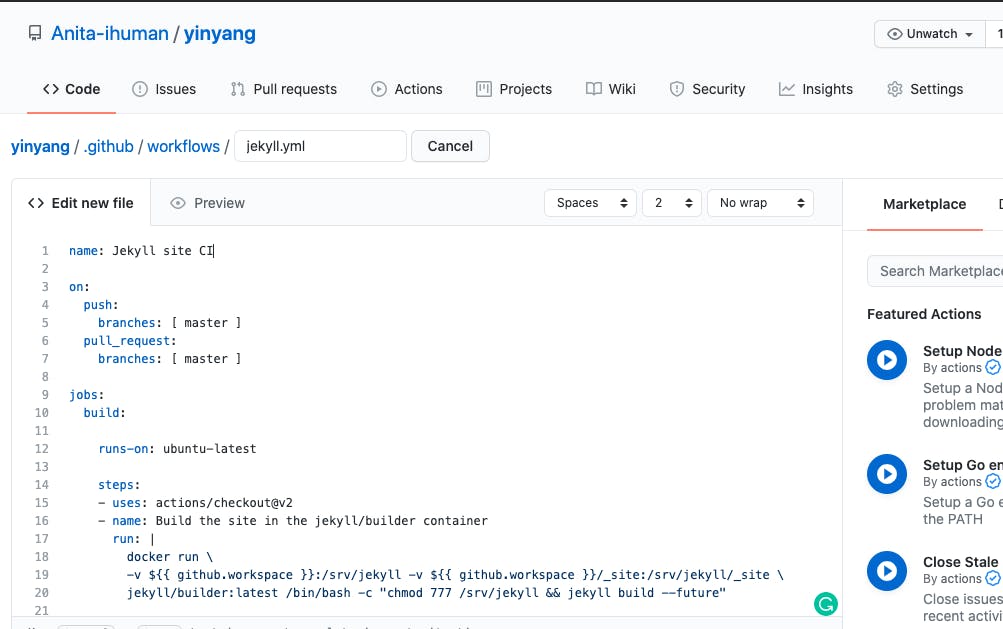
- Now commit your changes and this file will automatically be created in your repository inside .github/workflows/jekyll.yml depending on what you name your file as.
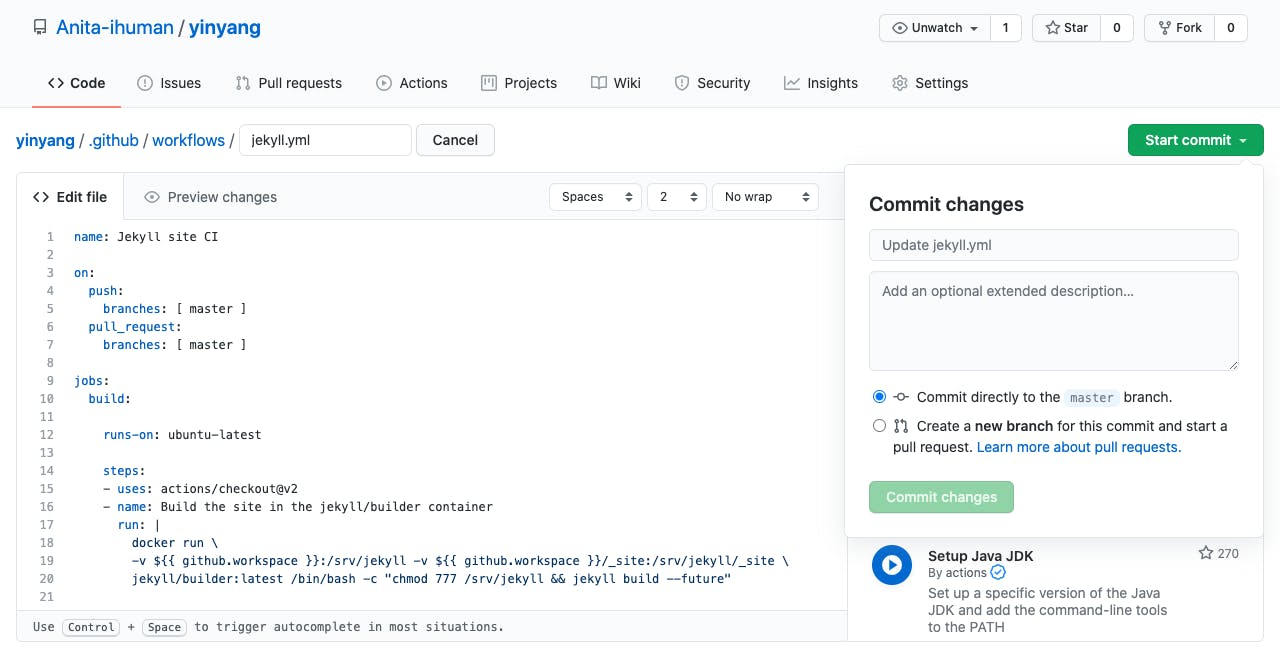
- Just as it is seen in this photo, I have created my YAML file

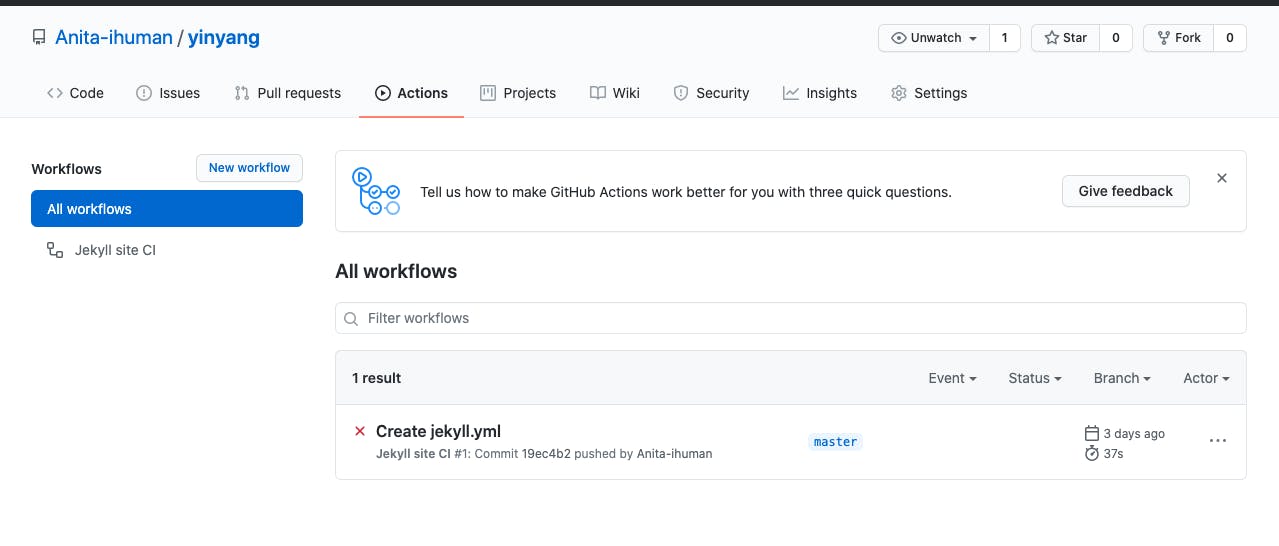
- To see our new action run, we can again click on the Actions tab which will navigate us back to our new Actions dashboard. Just as you can see, my dashboard shows that the tests failed. You can try this and play around with your pet projects, it doesn't have to be a Jekyll template.
- You can now proceed to the setting in the repository to make further changes that you expect this workflow to act according to. First, navigate to Settings, then Branches on the Navbar by the left, and click Add Rule. Once you are done click Create at the bottom of the page

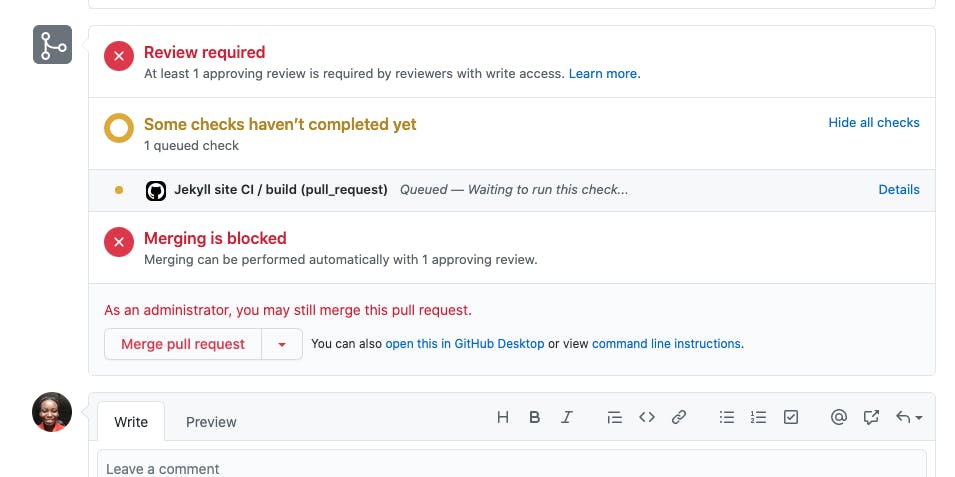
- Now make a commit and you will notice that it states that we need our statuses to pass before we can merge. As an administrator of this repository, I have the privileges of merging this pull request regardless of the failed checks.
Note
- Github workflows are reusable, that means if you come across a workflow that performs awesome tasks you can copy it into your own project.
- Github templates in the marketplace are free and Open source, you can contribute your own scripts too for other people to use.
- You can have more than one workflow in your project.
I encourage you to explore the Github Marketplace and check out some of the templates available.
Conclusion
Voila!!!! now I have a new Github Action that runs my tests and prevents pull requests from merging if they fail in my project. This is a basic guide on how you can automate your GitHub Actions in your project and get really awesome actions that will save you the stress of doing all these checks on your own. You can also write your own scripts to configure a workflow that will perform whatever task you prefer in your project.

